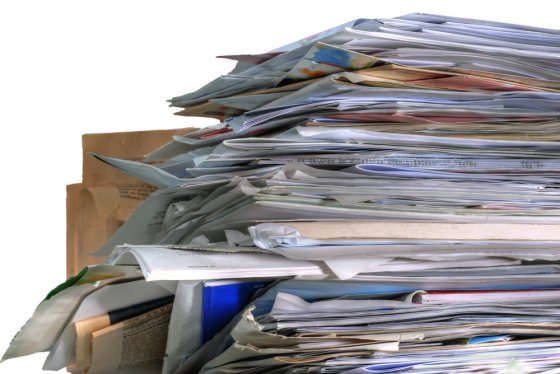
I’ve begun the purge. I’ve scanned and thrown out so much paper that being paperless in 2012 is becoming a reality.
When I mean paperless, it doesn’t mean zero paper. Some paper you have to hold onto, but I’m really trying to get rid of as much paper as possible, plus for the future, collect as little as I can. That includes everything that’s in my filing cabinet, but it also includes books as well. All this paper is simply taking up too much unnecessary space, is poorly searchable, and it’s also not secure in its non-digital form.
Number one rule for a paperless strategy
 Success for any life changing endeavor is simplicity. If you don’t create a simple enough strategy, you won’t actually do it nor will you keep up doing it. I learned this when I started my video a day of my son (still going strong), and I realize it also for any exercise regimen. Don’t let your excitement of what you want to achieve go beyond what you’re truly capable of doing.
Here’s my process so far:
 Step 1: Throw out unnecessary papers
We all collect garbage papers and we don’t throw them away. Time to chuck them. Remember to recycle.
Step 2: Some documents you have to keep
You’ll have to keep a variety of documents still in their paper form, such as notarized documents, the title to your car, and birth certificates. But it’s good to scan those in as well in so that you have a digital record.
Step 3: Create a digital filing cabinet
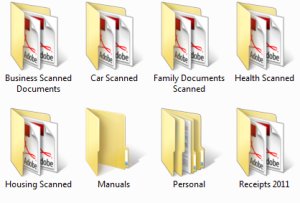 Now that you’re going to become paperless, you’re going to need to store digital copies of your files on your computer. Look at your filing cabinet and begin creating a digital folder structure that mimics what you have in your filing cabinet, if not more so. For example, create a folder entitled “Receipts 2012” and then under that create subfolders for each month, but give them two digit numbering to simplify sorting (e.g., 01-12, 02-12, 03-12).
Step 4: Scan your documents
 To pull this off you’ll have to have a scanner that’s got a sheet feeder. To do this without a sheet feeder will take you forever.
There are tons of different documents you can scan and then throw away. Receipts, health documents, and other sensitive information are the obvious first items to scan, but I would also look at mementos, such as cards, letters, and things you’ve written in the past. Is the actual card really important, or would you be OK if you just scanned the card to keep the sentiment and threw the card away?
Depending on how you like to keep the settings on your scanner, you’ll probably have to optimize and compress your documents as well. This will reduce your file sizes dramatically. Adobe Acrobat is the standard, but you also might want to try Power PDF Compressor.
 Step 5: Turn off paper billing
Almost every recurring bill has the option to turn off paper billing and to just receive an email alert when your bill is ready. Go through all your billing accounts and turn off paper billing.
Step 6: Capture receipts going forward
There are tons of solutions for financial tracking, but you’re probably already using an application such as Quicken. No need to change what you’re doing. Still, you’ll want to capture all receipts going forward from here. Quicken has a method to attach a receipt image to a line entry, but it’s such a pain in the butt to use it’s not worth it. That feature will be valuable once Quicken releases a mobile app that lets you capture images of receipts.
 You’ll want to capture receipts in a variety of different ways:
- Online purchases – You’ll get a receipt via email. Save as a PDF.
- Recurring bills – You’ll be able to download a PDF copy of your credit card bills, phone bill, cable bill, and more.
- Retail stores – Whether you’re at a restaurant or other retail establishment, your best bet is to use Evernote to capture your receipts via your mobile phone. If you have to fill out formal expense reports, you can use Expensify in conjunction as well.
- Paper bills in the mail – Use your scanner.
Step 7: Throw away all your manuals
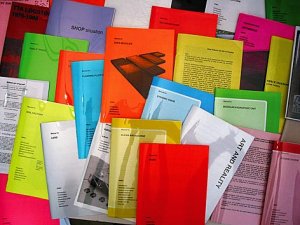 Almost every single manual is available online in a PDF. Stack up all your manuals and search for each one online as a PDF. Once you find it and download it, chuck it into the recycling bin. For the manuals you rely on a lot, you can save it to your iPad or mobile device for easier access.
Step 8: Sign contracts digitally
 Many of your important papers are signed contracts and one of the most difficult things about contracts is actually getting them signed. Making someone print out a document, physically sign it, find your fax number, and then fax it to you, is a long laborious and unnecessary process. It’s often the reason documents take so long to get signed.
Switch to digital signatures. I use a service called EchoSign that I use and have noticed a much quicker turnaround for signed contracts. I still give people the option to print the document, sign, and then fax. While I do want to stay paperless, I want to get the contract signed first. Another possible option is DocuSign.
Step 9: Receive faxes via online service
I have a fax machine, but I don’t use it to receive faxes. Instead, I signed up for eFax and got a free inbound fax number that I give out to people who want to send contracts. Anytime I receive a fax, it comes directly into my email, and if it’s something I want to save, I just save it as a PDF.
Step 10: Dispose of your sensitive documents
 You’ll have plenty of nonsensitive documents. You can definitely throw those in recycling. But for the sensitive documents, you’ll want them destroyed before they’re recycled. A paper shredder is good for small jobs. But if you’re doing a massive purge a simple paper shredder can’t handle that volume. Luckily, you can go to your local FedExKinko’s and throw all your sensitive documents into a giant locked box which will be taken offsite and be destroyed. No charge.
Step 11: Secure your documents
Since you’re putting all the documents in digital form, you’ll want to secure the documents through either password protection on your computer, and/or full encryption.
Step 12: Always have an export option
Don’t ever rely on any new solution for managing all your receipts. Applications come and go, but you’ll need many of your digital documents for longer than the lifespan of your application. For that reason, no matter what solution you choose, make sure it has an export option.
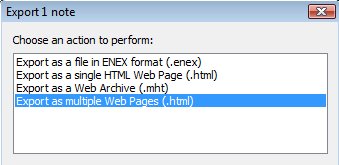 For example, as much as I like Evernote, I take all my receipts out of the program eventually. Evernote’s desktop application has an option to export your notes to an HTML document. For my receipts, I just export the Evernote receipts to the digital file folders I created on my hard drive.
Step 13: Backup locally and online
 Get yourself a local backup system that mirrors every item you save on your computer. A 3 Terabyte external storage drive can be had for only $150 these days. That will surely backup all of your data. In addition, an online backup system will protect you from any unforeseen tragedy. There are a bunch of solutions out there, but I’d recommend Crashplan for its versatility in managing your backup and its low cost (about $5-$10/month depending on the package).
Step 14: Become a digital reader
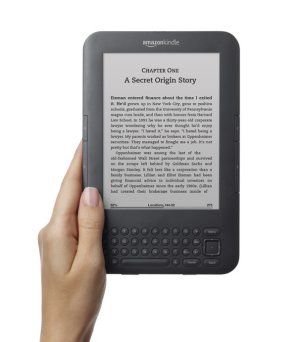 Don’t ever purchase a new book in paper again. Get yourself an eReader or tablet device. Every new book is made available digitally. So if you’re going to buy a new book, make sure it’s a digital book. For anything that’s in paper, go to the library or borrow a friend’s book and then return it. That way you won’t be stuck with so much paper.
I’ve taken almost all these steps so far myself and should complete and continue the process by early 2012. Do you have any suggestions you can share with me and fellow readers?
All scanning and paper images from Shutterstock. And manuals image from N55.dk.

